Oct 8, 2018

Let's Paint Star Wars: Rebellion

They had more than a hundred ships in their following when they sailed into the harbor of Aldiranborg, and the entire harbor was full of Norwegian warships as far as men could stretch their eyes.
- Tattúínárdǿla saga, Chapter 28: Concerning the Burning of Aldiranborg


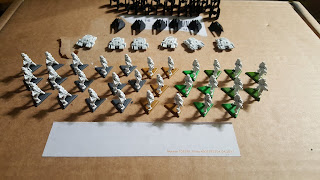
I previously talked about how much we enjoyed Star Wars: Rebellion. One of its attractive features is the miniatures, which really contribute to the feel and theme of the game. Below are all the models from the base game and the Rise of the Empire expansion (as well as some Armada models, but ignore those), and, well, there are several.


I'm going to paint them! Or at least some of them.

Painting miniatures isn't just an aesthetic thing: it's a lot easier to tell different miniatures apart and spot them on the board or table if they're even rudimentarily painted. The Rebellion board is mostly black, like our TV table above; the white rebel miniatures stand out quite well, while the grey Imperial models tend to blend into the background and each other, forming a grey mass where it can be difficult to tell how many and what kind of miniatures there are. So if I'm going to paint something, I should start with the Imperials, and especially the smaller models.

Another angle is figuring out where you get the greatest return on investment. Most of the Imperial starships are grey, and you could paint them... well, grey. I think my last priority would be painting the Death Stars, as it just doesn't seem necessary. However, it's almost miraculous what you can do to a drab plastic model if you make it a nice base! So infantry models with bases tend to offer the best return on investment; I'm especially looking at the stormtroopers here. However, I also read a very clever blog post on how to paint TIE Fighters easily, and that also represents a considerable return on investment, since there are 24 of them!

So, based on this logic, I'm going to start by painting the stormtroopers and TIE Fighters. Because I've got the expansion unboxed as well, I'm also throwing in the TIE Strikers and assault tanks, because the same painting logic should work for the Strikers as for the Fighters, and I like tanks.


So here's what I did!

**

1. TIE Fighters and Strikers

I'm trying r2eq's method, which seems wonderfully simple - something you want when painting two dozen tiny models!

Phase 1: black primer


I used Army Painter matt black primer, and did the Death Star bases while I was at it. The primer was excellent; I highly recommend it.

Phase 2: drybrush the hull with Neutral Grey


Apart from the spray primers, I exclusively use Vallejo paints. A Neutral Grey drybrush paints the hull while leaving the cockpit windows and engine exhaust black, which is perfect.

Phase 3: paint the "spokes" and edges of the panels Neutral Grey


And that's it! Spray on varnish and it's done.

2. Stormtroopers

Phase 1: white primer


The Army Painter white primer is every bit as good as the black. Very satisfying finish.

Phase 2: bases


Like I said, bases are an easy way to make models look so much better! I knew from the outset that I didn't want to paint up 30 identical stormtroopers, so I went trawling through Wookiepedia for different paint schemes, and figured out appropriate bases for each. I did about half in Basalt Grey, which I think is a neutral enough color that can represent, say, rock or the deck of a starship. It's dark enough to be a good contrast for a light miniature, but not black enough to look like the poor guys are standing on empty space when you put them on the board. The sand-colored bases in the middle are German Camo Orange Ochre; the light green ones are, well, Light Green; and finally the dark green bases are German Camo Bright Green.

Phase 3: black details


You can do all sorts of complicated things with inks here if you want, but I just straight up painted the eye slots, guns and leg joints black. You can apply paint fairly liberally, as it can be painted over in the next phase.

For one group of stormtroopers, black details meant literally everything except two dots of Fluorescent Green per model: Krennic's Death Troopers.


Yes, they have black armor and black guns. Yes, it will be impossible to see them on the board. No, I was not in charge of wardrobe for Rogue One, so it isn't my fault. I liked the movie, so I wanted the Death Troopers to be represented among my models.

Phase 4: paint the armor your chosen color

For your basic stormtroopers, this simply means giving the white armor parts a coat of white paint, and you're done! If, like me, you suck at painting, this is a perfectly acceptable level of detail to shoot for.


Or choose a different color! I also painted up some crimson stormtroopers because apparently they canonically exist; I chose them to evoke the (in my mind nonsensically named) Emperor's royal guard. The color is Vallejo Scarlet.


Finally, going through stormtrooper subtypes on Wookiepedia taught me that such things as forest troopers exist; as a published forest history researcher, how could I resist? Instead of painting the armor white, I gave them a coat of Luftwaffe Camo Green.


Phase 5: apply armor markings

Like I said, I wanted variety in my stormtroopers and looked through Wookiepedia for some paint schemes. Below are two simple ones: the guys with red markings (plain Vallejo red) are Imperial shock troopers, and the ones with blue shoulder pads are stormtrooper snipers (Deep Sky Blue).


Phase 6: finish bases and varnish

When all the various paint schemes were done, I gave all the stormtroopers a coat of Gloss Varnish, and then set out to finish their bases. The basic stormtroopers, snipers and crimson stormtroopers got a simple Basalt Grey base, which I think kinda works for contrast.


The shock troopers' bases are German Camo Orange Ochre, with sand stuck on and painted Tan Yellow.


The forest troopers' bases were simply flocked.


For the Death Troopers, I wanted to evoke the scene at the beginning of Rogue One where they're fetching Galen Erso from Lah'mu, so I glued some larger flock to their bases, and I think it worked all right:


So here they all are!


I am just absolutely delighted with the way these turned out.

3. Tanks

I took the easy route with the tanks: I primed them white with the stormtroopers, and then painted two of them Neutral Grey. Two others got a coat of Luftwaffe Camo Green to match the forest troopers, and the last two were done in Tan Yellow to go with the shock troopers' sand bases.


I'm unsure whether to do more with them or not; in my opinion, a simple coat of paint makes them look like combat vehicles.

4. Captain Phasma

Apart from painting up different kinds of stormtroopers, I also knew I wanted to do something special. Now, I didn't particularly like the new trilogy, but it did have some excellent characters, and even though I'm sure it's a horrible anachronism, I wanted to include my favorite: Captain Phasma. I mean basically, she's a stormtrooper with a cloak. So I found some antique green stuff I had lying around, and made a cloak:


I rolled out an approximately cloak-sized chunk of green stuff and tried to make it look like it flows off her shoulders like her cloak does in the movies. She was then primed white with the other stormtroopers.


I gave her a Basalt Grey base and painted the edges of the cloak with Red.


The rest of the cloak, the armor joints and eyes were painted black.


Here's a view of the cloak from behind; I think it looks great!


Finally, the armor was painted in Natural Steel (whatever that is!), which I think turned out to be absolutely perfect. Here she is hanging out with the Death Troopers, because I was finishing them at the same time. The armor was varnished with Gloss Varnish, and the cape and gun with Matt Varnish.


I couldn't be happier with my Phasma! I've done my share of conversions on 28mm models, but never on anything this small, and I've rarely done anything with green stuff - never anything this substantial. So I'm absolutely delighted. I think this is the best model I've ever made: certainly it's the one I'm most proud of.

**

So that was the first batch of models!


They've made a significant dent in the sea of grey that is the Empire, but there's still lots of work to do!


I was working under a time constraint when I painted the first miniatures: everything had to be ready to be packed away by the time we left to spend Midsummer in the country. I think the stormtroopers and TIE Fighters looked great!


For the next batch, however, there's no rush at all, which means I could look into painting some rebel infantry. The rebel troopers are the biggest group of unpainted models left, and while I'm at it, I might as well paint the vanguards from the expansion too.

The next most common model remaining is the Y-wing, which I accept is a thing that exists in the Star Wars universe, but that's pretty much the extent of my feelings towards it. You can see why I started with the Imperials. Speaking of whom, there are also ten AT-STs.

Finally, in recognition of the glorious victory of Malastare in our first game ever, where the Emperor defeated the revolution using only a single assault carrier, I'll be painting the assault carriers as well.

Therefore, batch 2 consists of 21 rebel troopers, 6 rebel vanguards, 12 Y-wings, and 10 AT-STs and 8 assault carriers; everything's getting primed white.


5. Rebel scum troopers and vanguards

I was kind of struggling to come up with ideas to paint my rebel troopers, other than the basic Alderaanian consular security look. The Rogue One visual guide was a great help and inspiration here; I quite liked the ramshackle but very military look of the rebel troops in Rogue One, and it inspired me to put in a little effort with my troopers. I therefore painted up a bunch in their mixed greens, browns and blues. The blue is Dark Blue, the greens variously Luftwaffe Camo Green, Medium Olive and German Camo Bright Green, and the browns include German Camo Orange Ochre and Stone Grey.


Of course, I did some Alderaan guys as well. The shirts are Dark Pale Blue (surely an oxymoron?), the pants Neutral Grey and the helmets Ivory. I also painted two figures as rebel honor guards, with Luftwaffe Camo Green uniforms and Ivory helmets.


Another group was modeled on the Endor strike team from the movies; the green is USA Uniform drybrushed with Light Green, and the vests Neutral Grey.


To add a little color, I painted three figures as rebel pilots, with Orange flight suits and Ivory helmets and vests.


Finally, I wanted to do something a little special with my rebel troopers as well. One paint scheme for the troopers that suggested itself was the Hoth snow camouflage; but if I was going to do that, what do I do with the base? Plain white doesn't usually look great on a base, as it just tends to look unpainted. Then it occurred to me that a friend of mine has glitter paint! Or to be specific, pearlescent acrylic, but y'know, it glitters! So I had to try it.


And it worked! The mix of ink and Matt Medium doesn't glitter much, but it does give the bases a kind of, well, pearlescent hue that's easily the best snow effect I've ever managed to produce.


6. Y-wings

The Y-wings ended up becoming the testbeds for my rebel paint scheme ideas, and I think they turned out all right. First, I painted the engine bays and cockpit window black.


Then the hull was given a coat of Ivory, and the rods on the nacelles were painted Gunmetal Grey. I then did the squadron markings: three Y-wings each from Red, Blue, Green and Gold squadron.


I wasn't entirely happy with the Gunmetal Grey, as I think it ended up being too dark, so I gave those bits and the protrusions on the rear part of the hull a little highlight in Natural Steel, and painted the cables (?) coming off the nacelles with Copper. I also dabbed just a tiny amount of Natural Steel on the front of the nacelles. Finally, the whole model was given a wash of thinned-down Smoke to give it a slightly dirty, worn look.


I absolutely love the way these turned out! I wanted them to be a kind of slightly dirty off-white color to really contrast with the clean grey of the Imperial models, and the Ivory-Smoke combo worked brilliantly. I'll be painting all the rest of the rebel small craft with the same scheme.

7. AT-STs

These guys were easy to paint: I painted the legs with Dark Seagreen, and then did the top bit in Neutral Grey and gave the legs a light drybrush with the same. They were based to match the various stormtrooper bases, plus a pair in white and glitter.


8. Assault carriers

These are some of the easiest models I've ever painted. First, I gave them a coat of Dark Seagreen:


Followed by drybrushing with Neutral Grey.


I quite like the end result, so I'm sticking with it. I'm kinda tempted to just do the star destroyers the same way.

**

So here's batch two in its finished glory:


I actually got through these figures so fast that I still had time for another batch before our next trip to the country. Now that I have a paint scheme for the rebel fighters, I feel like I have to paint up the X-wings as well; after all, they blew up a Death Star for me! While I'm at it, I might as well do the airspeeders and U-wings as well, to finish all the rebel small craft.

On the Imperial side, the AT-ATs are the last unpainted Imperial ground units, and I'm going to try the assault carrier paint scheme on the Interdictors because we haven't got as far as using the expansion yet, so if it doesn't work out I'll have time to fix it. Finally, I think I discovered the perfect blues for a super star destroyer? Only one way to find out!

**

9. X-wings, U-wings and airspeeders

I used the same method as with my Y-wings, starting with painting the cockpit windows, guns and what have you in black.


I then did the metal bits in Gunmetal Grey, painted the hull Ivory and added squadron markings:


And finally, a wash of watered-down Smoke ink.


10. AT-ATs

These big boys got a base coat in Dark Seagreen, and I then painted the large surfaces on the hull with Neutral Grey. It's a bit dark grey perhaps, but I'm happy with it.


11. Interdictors

To test the assault carrier scheme, I painted the three Interdictors with Dark Seagreen, and then drybrushed with Neutral Grey. This, I think, turned out too dark.


Drybrushing with Light Grey, however, worked!


12. Super star destroyers

My super star destroyer paint scheme was very simple: basecoat in Dark Blue, followed by drybrushing with Dark Blue Pale. I think it's perfect.


**

So, with the Interdictors set aside for the moment, here's the finished third batch of miniatures.


The big picture is also starting to look a whole lot better.


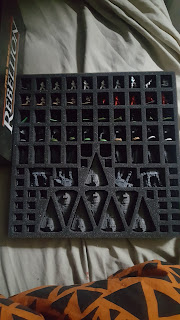
At this point, I set off for the country again, and I can't go on without praising the Feldherr foam trays my friendly local game store sold me. Look at them!


Everything fits brilliantly and travels safely.


There's even spaces for all the cards, counters and dice.


These were fairly cheap where I got them, and I definitely recommend them, especially if you have to move your game around at all.

**

That's what I've managed so far! I'll be finishing the starships and ground installations over the winter, so hopefully by next year, I'll have a fully painted set of miniatures. These models have been lots of fun to paint; I have a feeling I'm going to need another painting project when this is done...

Oct 1, 2018

Let's Read Tolkien 49: The Road to Isengard

So it was that in the light of a fair morning King Théoden and Gandalf the White Rider met again upon the green grass beside the Deeping-stream.

After the battle, Gimli and Legolas are reunited and get to compare scores; Gimli wins by an orc. Gandalf announces he is heading to Isengard, and of course everyone wants to go with him. To get there, they ride through the new woods that showed up during the night, for which Gandalf has disclaimed responsibility. Legolas is fascinated by the forest, and Gimli wants to tell him all about the Glittering Caves in Helm's Deep, and launches into a surprisingly lyrical account of how wonderful they are. They agree that after the war, Legolas will go and see the Glittering Caves with Gimli, and the swarf will join the elf in visiting Fangorn.

On their way, they spot an ent seeing to the trees, and Théoden marvels at it, remarking on how the Rohirrim have become too inward-looking, not caring about either the putside world or their past. This turns into a very important exchange that captures the sense of pervasive sadness that resounds throughout the Lord of the Rings:

"Yet also I should be sad," said Théoden. "For however the fortune of war shall go, may it not so end that much that was fair and wonderful shall pass for ever out of Middle-earth?"

"It may," said Gandalf. "The evil of Sauron cannot be wholly cured, nor made as if it had not been. But to such days we are doomed. Let us now go on with the journey we have begun!"

As they go on, they reach the fords of the Isen, where they find the flow of the river reduced to a trickle, and a burial mound for the fallen men of Rohan created by the Ents. A long description of Saruman's fortress of Isengard follows: a tall tower, surrounded by a courtyard and a ring-wall. But when the King's company arrives, they find Isengard laid to waste, with the Isen dammed inside its walls, and the former gate guarded by two hobbits, one smoking and the other asleep: Merry and Pippin. After they've introduced themselves to Théoden and discussed pipeweed with him, the king and Gandalf set off to find Treebeard, and Aragorn, Legolas and Gimli stay behind to catch up with the hobbits.

**

This is kind of an interval chapter after the dramatic battle of Helm's Deep, but the exchange between Gimli and Legolas, for example, is great stuff. Théoden's lament on the provincialism of Rohan is reminiscent of Tolkien's description of the Shire.

Finally, there's an odd little tidbit here. At the very end of the chapter, Gandalf says to Théoden: "For Treebeard is Fangorn, and the eldest and chief of the Ents, and when you speak with him you will hear the speech of the oldest of all living things."

Remember Tom Bombadil? This is what he had to say about himself:

"Eldest, that's what I am. Mark my words, my friends: Tom was here before the river and the trees; Tom remembers the first raindrop and the first acorn." (my italics)

Most likely, this is a simple lapsus by Tolkien, but if we accept it as true, is either Gandalf or Tom lying? Unlikely. The best explanation would seem to be that Tom isn't a living being. Work that into your theories!

**

Next time: a picnic.

Sep 17, 2018

Let's Play Fallout: the Board Game

The captain stood studying it through the periscope. If the Geiger counter was correct no life could exist there for more than a few days, and yet it all looked so normal in the spring sunlight that he felt there must be people there. There did not seem to be glass broken in the window, even, save for a pane here and there. He turned from the periscope. "Left ten, seven knots," he said. "We'll close the shore here, and lie off the jetty, and hail for a while."

- Nevil Shute: On the Beach

Fantasy Flight Games have come up with a Fallout board game, and of course we had to try it.


Nicholas Roerich: Tombs in the Desert, 1930

**

At first glance, the game appears bewildering: there's piles and piles of tokens, a massive card library and several encounter decks, and a map made up of hexagonal tiles that mostly start out face down. As seems to be standard with Fantasy Flight products, there's both a "learn to play" booklet and a heftier rules reference.


Appearances are deceptive, though, because once you sit down and start playing, Fallout is engagingly simple to pick up, and very much worth it. Each player controls a survivor, who treks through the wasteland, fighting monsters and completing quests. For every game, you pick a scenario, and they all start with some quests in play; completing them shuffles new cards into the encounter decks, gets you stuff and agenda cards, and so on. Ultimately the game is won by the first player who gains a set amount of influence from their (secret!) agenda cards.

Here's a shot from one of our first games; my Wastelander is armed with a sniper rifle and wearing metal armor, while on my left is a Brotherhood Outcast with a knife. Each player gets a cute little cardboard thing where we keep track of our hit points, rads and experience.


**

A recurring theme in our first, two-player games was that my friend really liked playing the Brotherhood Outcast, running around in power armor and stabbing the shit out of everything. He discovered this in our first game, then tried playing the Vault Dude in the next one and being serious, and went back to stabbing everything in the third game. When literally the first loot card he got was a Combat Knife, clearly the wasteland spirits wanted it, so who were we to argue?

Now, as it happens, I have quite a few Warhammer 40,000 bits lying around, so I decided to make him a little Fallout figure to capture his particular play style: a World Eater Chaos Space Marine.


He will stab you. Now, arguably I could just as well have made him a Blood Angel, but the Chaos bits are more fun and really, what's the difference anyway?


I even gave him a little World Eater logo transfer.


**

Next, it was time for a four-player attempt. The amount of influence needed to win the game decreases with the number of players, so there should be less turns with four players than with two. Overall, I think the game took a lot more time, though: there was more deliberation, and the possibility of trading with other players led to some complex trading schemes - and we didn't even trade any agendas!


Here's our World Eater Brotherhood Outcast in action, with my brother's ghoul literally hiding behind him.


Eventually, with three copies of the Freedom agenda, my brother won.


Each scenario has two factions, titled freedom and security: in the Capital Wasteland they're the Brotherhood and the Enclave, in the Commonwealth they're the Railroad and the Institute. If you hold one of their agendas, advancing that faction's interests will net you influence - but if either faction gains too much power, they win the game and all the players lose!

**

We tried another four-player game later, and while it was fun, it highlighted what I think is the most serious problem with the game: deadlock.


Especially with four players, it's likely that someone will be trying to advance both factions. Unfortunately, this can easily lead to a situation where advancing the main quest would mean losing the game for everyone, but a shortage of side quests means there's also few or no ways to get additional agenda cards. This is especially bad for players who end up with an unwieldy combo of agendas, like a straight freedom/security split. Effectively this means the game is deadlocked: no-one can win, but everyone will eventually lose as the factions gain power. It's a little frustrating; we ended up losing on purpose by advancing the main quest. That's not really a good outcome.

**

Still, though, we've enjoyed ourselves, and with an expansion already announced, we'll definitely be returning to the wasteland! There are lots of mechanics in this game that I like, it does a first-class job of capturing the spirit of the video games, and above all, it's a fun time.

Sep 10, 2018

LotR LCG: Return to Arnor

Kings of little kingdoms fought together, and the young Sun shone like fire on the red metal of their new and greedy swords.
- The Lord of the Rings, book I, chapter VII


Way back when we tried the Lost Realm deluxe expansion for the first time a couple of years ago, we weren't too impressed. It was a real shame, too, since I have a soft spot for Eriador. However, here we are: it was the last deluxe expansion before Wilds of Rhovanion that we haven't played, and since the Crossing of Poros was so interminably delayed, we had a bunch of time on our hands. So let's see what the experience is like with a considerably larger cardpool.

**

Intruders in Chetwood - DL 4


In the first quest of the expansion, our heroes set off from Rivendell to help a ranger track a party of orcs heading for Bree. There's just a single quest stage, but you'll be hampered by encounter side quests, and also have to destroy all the Orc War Parties you come across. All the while your threat is raised by enemies in the staging area, but they don't make encounter checks so you have to pick them off one by one.


There's quite a bit of ally hate and some multiple attacks by enemies, which is decidedly less fun with post-errata Boromir. There's also a lovely uncancellable Treachery where everyone suddenly attacks you. So in all, you need to quest, fight and do location control while your threat is racing upward.

It's not a bad quest by any means, and I do have to say that the art on the locations is some of the best in the game. The enemies, however, are actually quite dull, which kind of detracts from the experience.

**

The Weather Hills - DL 5


After intercepting the orcs, our heroes hunt down the survivors in the wilderness. Here you have to explore locations to find orcs to kill, and once you've killed enough of them, the final quest stage unleashes a flood of encounter cards that you have to quest through in a limited time. All this is done while also dealing with a pile of nasty weather treacheries.


This is a quest I really want to like: it's got very pretty locations in Arnor, and very strongly Tolkien themes of ruins, travel and weather. In practice, though, we're facing almost the exact same orcs as in the previous scenario, and they're still boring. There's also an extra level of difficulty to the quest that we felt was unnecessary. I generally like it when different mechanics and themes in a quest interact with each other, but here they just pile difficulty on top of difficulty. Again, I wouldn't say this is a bad quest, but it's quite tough, and quite heavily dependent on either some strong combat ability or plentiful healing. I also suspect it would lend itself quite well to a We Must Away -style delay in finishing the first stage.

**

Deadmen's Dike - DL 7


In the last quest of the expansion, our heroes end up in Fornost or something, and you have to fight a horde of the undead, as well as a special undead bad guy. I actually feel we did better against this quest than the others, but maybe that's just luck. Some of the sorcery effects are interesting, and the location art remains excellent throughout, but I dunno, this quest didn't exactly captivate us either. We were eventually overrun by a massive pile of undead in the last quest stage.


**

As for player cards, this is a strongly thematic expansion, with almost every card directy associated with the Dúnedain trait. The heroes are Halbarad and Neil Young Aragorn, both of whose abilities are keyed to engaging enemies, which is what Dúnedain decks are all about.


There's also a whole stack of Dúnedain allies, and an attachment to get them into play faster - provided you're engaged with an enemy, of course. There's a couple of nice touches, like Weather Hills Watchman, who lets you fetch a Signal card from your deck - say, one of those handy little stat-boosting attachments from way back in the Mirkwood cycle - and Dúnedain Hunter, who fetches an enemy from the encounter deck. The latter is clearly very handy for Dúnedain decks, but we've also had some success using him to find someone for Legolas to kill. There's also Ranger of the North, a unique player card in that you shuffle it into the encounter deck.


A couple of other cards are also of broader utility: Secret Vigil gives Tactics some fairly rare threat reduction, and Athelas provides a whole bunch of healing, with a useful side effect of also removing a condition attachment. I should also mention the first-ever player side quest, Gather Information; after all, it's not every deluxe expansion that introduces a whole new card type.


So basically, if you want to build a Dúnedain deck, you need this expansion, and they're a lot of fun to play! If not, there might be something useful for you, but nothing particularly unmissable. This really is a fairly tightly focused set of player cards.

**

With a much broader card pool than last time, the quests of the Lost Realm are still difficult, but not kick-in-the-face difficult like, say, Heirs of Númenor. Still, there's a reason why I'm posting about this game so much less nowadays: it's that it's too hard to be fun any more. Each of these quests felt like a chore to play, because we barely felt we had a decent chance at beating them at all. The Dream-chaser cycle aside, where we actually managed to beat most of the quests, this has become the rule rather than the exception.

The fact is, me and my partner barely play any more at all; we only tend to get the cards out if there's a third person interested in playing. The quests are too big, too fiddly and too frustrating; if I'm up for something big and exhausting, I'll rather play a board game like Star Wars: Rebellion or Game of Thrones. I still enjoy the deckbuilding aspect of the Lord of the Rings card game, but it's becoming painfully obvious that it's not really possible to make a take-all-comers deck, and neither of us is at all interested in starting to create bespoke decks for single quests.

Increasingly, what this means in practice is that we'll buy new stuff, sometimes, for the player cards, but mostly we end up playing quests from the first two cycles, and some occasional later favorites. Because those quests were mostly fun. We still haven't even gotten round to starting the Lord of the Rings saga, and I don't even know if we will. I mean, I grew up playing Nethack, I enjoy a challenge; but we've been frustrated by so many quests that we found unreasonably difficult that the game just hasn't been fun any more.

**

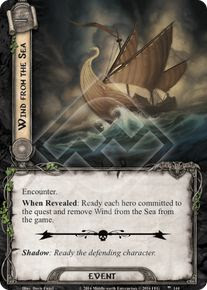
We did finally get the last two adventure packs of the Haradrim cycle, and they come with some excellent cards. One I absolutely have to try is Flight to the Sea: it lets you shuffle a copy of the brilliant Wind from the Sea into the encounter deck.


This is the first player encounter card we've seen since Ranger of the North - introduced, appropriately enough, in the Lost Realm. Unlike Ranger of the North, Wind from the Sea has a shadow effect, and it doesn't have surge. In short, I think this is going to be a really, really good card, and I'm very much looking forward to trying it out.

Another thematically irresistible card, especially now that I'm playing the sequel to Middle-earth: Shadow of Mordor, is Magic Ring.


At a limit of one per deck, I think this is kind of a no-brainer to include, but we'll see. Certainly it's high time we saw some magic items whose use carries risks!

A change I'm considering is swapping Arwen for Lanwyn and Elven-light for ally Arwen. I had some success with Lanwyn in my hobbit support deck, and I might want to take a shot at building a Dale deck when(ever) Wilds of Rhovanion shows up. Her ranged attack and ally Arwen's sentinel-granting ability should make combat a little bit easier, and give us a little boost when facing surge, all at the cost of one willpower and Arwen's discard ability. But we'll leave that to the future, and concentrate on trying the new additions for now.

56 cards; 30 Spirit, 21 Lore, 5 neutral; 24 allies, 12 attachments, 16 events, 2 side quests. Starting threat 28.

Arwen Undómiel (TDR)
Idraen (TTT)
Rossiel (EfMG)

Allies: 24 (17/6/1)
Jubayr (TM)
Northern Tracker x2
Súlien (TCoC)
Elrohir (TMoF)
Lindir (TBoCD)
Rhovanion Outrider (ToTD) x2
Bilbo Baggins (TRD)
Galadriel's Handmaiden (CS) x3
West Road Traveler (RtM) x3
Dúnedain Pathfinder (RAH) x2
Elladan (TMoF)
Gléowine
Mablung (TLoS)
Warden of Healing (TLD) x3
Gandalf (OHaUH)

Attachments: 13 (6/6/1)
Unexpected Courage x2
Ancient Mathom (AJtR) x2
Light of Valinor (FoS) x2
A Burning Brand (CatC) x2
Cloak of Lórien (CS) x2
The Long Defeat (TBoCD) x2
Magic Ring (TCoP)

Events: 17 (6/8/3)
Flight to the Sea (TCoP)
A Test of Will x3
Elven-light (TDR) x2
Leave No Trace (EfMG) x2
None Return (AtE) x3
Daeron's Runes (FoS) x3
Keen as Lances (EfMG) x3

Side quests: 2
Double Back (EfMG)
Scout Ahead (TWoE)

Sep 3, 2018

Let's Read Tolkien 48: Helm's Deep

The sun was already westering as they rode from Edoras, and the light of it was in their eyes, turning all the rolling fields of Rohan to a golden haze.

The action opens with our heroes heading west, toward the fords of the Isen. They soon learn that Saruman's army is on the march, and has shattered the forces of Rohan at the fords. Saruman's forces are making for the great fortress of Helm's Deep (the most sensible opening move for Isengard in War of the Ring), so Théoden leads his army there as well, while Gandalf rides off and announces he'll meet them there.

To be specific, Helm's Deep is a narrow mountain valley, blocked by the Númenoran fortress of Hornburg and a wall. The Riders of Rohan deploy on foot to defend it, and soon enough the enemy is there. They fight a bunch: Éomer and Aragorn lead a sortie to stop a battering ram, and Gimli and Legolas have a contest to see who kills the most orcs. Saruman's guys blow up part of the wall with like wizard dynamite or something, there's a bunch more fighting, and eventually Théoden leads his riders out on what they figure will be a last cavalry charge just before dawn. As dawn breaks, Gandalf arrives, leading the Rohirrim who were scattered at the Isen, and also some trees are suddenly there. The enemy is routed.

**

Helm's Deep is the first major battle scene in the Lord of the Rings, and probably where Tolkien comes closest to glorifying, even carnevalizing war with Gimli and Legolas and their orc-killing contest.

It feels necessary to point out that neither Gimli nor Legolas are supposed to be moral exemplars. Would you trust either of then with the Ring? If you answered yes, you really haven't been paying attention. As fallen creatures, they can take pleasure in killing, even if it's wrong. I mean, you may remember that one time when Gimli's dad and his pals nearly started a war with the Woodland Realm over a gemstone.

But in the end, Tolkien doesn't portray killing as wrong. To me, this is another case of the Nordic saga traditions winning over Christianity. Incidentally, if you haven't experienced the Geoffrey Chaucer version of Snakes on a Plane, do. There's a Christian action story! The battle of Helm's Deep isn't.

There's also a strong real-life parallel to Legolas and Gimli's killing competition in modern snipers. There are rankings online and in literature that list military snipers by their "confirmed kills", as if it was a sports statistic or an arcade game high score. Some of them, like Simo Häyhä, shunned publicity; figures like Chris Kyle reveled in it. Some people have always experienced war as fun. Given the nature of Tolkien's military service, I highly doubt he was one of them; but in judging his depictions of war, it really is worth remembering that he was a veteran of one of the most bloody and senseless wars in human history. And once again, if you ever come across texts that really do glorify war, you'll find Tolkien does no such thing.

Having said that, the orcs and "wild men" are fairly dehumanized enemies here, so it's hardly likely to occur to most readers to question killing them. Here, also, the sagas win out over the gospels.

I find Théoden's variable moods quite convincing: while Gandalf is still around, he's upbeat, but then basically resolves to commit suicide by cavalry charge after stewing in the Hornburg.

Finally, the end of the chapter has Tolkien's revenge on Shakespeare, so to speak: Great Birnam wood did march to war.

**

Next time: road trip.

Aug 20, 2018

Let's Play a Game of Thrones: the Board Game (2nd ed.)

So, anyway, it turns out that Recently Headless Ned had a variety of sons who did not get pushed out of windows. One of them is Robb, and he wants to be King of Mystical Dragon Land! But Cersei has a son, Joffrey. He is the current King of Mystical Dragon Land! So Robb has to overthrow Joffrey, but also, Dead King Robert had brothers, who have figured out that Cersei’s babies were caused by illicit, brother-in-law fuck-times. And you’re not going to believe this, but Brother One (Renly) and Brother Two (Stannis) BOTH want to be King of Mystical Dragon Land! Then there’s Daenerys. She, too, wants to be Queen of Mystical Dragon Land, but is currently side-tracked, what with her being worshiped by various non-white populations. And yet! Robb had a foster-brother, Theon, who comes from a disgraced house of Viking equivalents. Theon is convinced that Viking equivalents should be the Kings of Mystical Dragon Land! Who will emerge victorious as the One True King of Mystical Dragon Land? I sure hope you didn’t want an answer to that, because it turns out there are like five more books in this series.
- Sady Doyle, Enter Ye Myne Mystic World of Gayng-Raype: What the “R” Stands for in “George R.R. Martin”


We took another of our tax-free booze and cheaper board games trips to Sweden last spring, and came home with Fantasy Flight's Game of Thrones board game.


It promises to be an epic strategy board game of plots and intrigue for the domination of Westeros - or, more to the point, Diplomacy, but fun. The first player to control seven castles or strongholds wins!


Anders Finer: Asha Greyjoy

**

As I've explained before, the only rightful rulers of Westeros are House Targaryen. Sadly, France Essos isn't included in the game, so everyone has to play a squabbling faction of filthy rebel scum. For our first game, I picked House Greyjoy, because of, well, Asha. Here we are, all smiles before the actual game began!


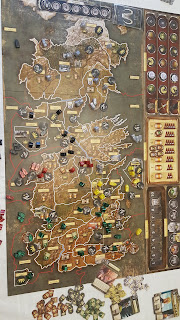
Below is the opening setup for five players. My Greyjoys are tucked away in Ironman's Bay, between the Starks in the north and the Lannisters to the south. Further south are the Tyrells, and to the east, the hated usurper. Because we're missing a sixth player, House Martell is replaced by a pile of neutral force tokens in the southeast.


The action kicked off with a Baratheon blitz into the continental Crownlands, capturing King's Landing and threatening to carve up Dorne. Lannister reacted by seizing Harrenhal, and the Tyrells moved into the inland Reach. I grabbed Seagard, but my problem was simple: Baratheon was threatening to win the whole thing, but I could only get to him through someone else. Either I'd have to attack the Lannister rear, or get in the way of the Starks' glacial advance down the east coast. I didn't fancy either option, as both would have taken quite a bit of pressure off the Baratheons. I was also slightly hamstrung by being on the last place on the King's court track, which meant the others could use the special Consolidate Power order to muster troops, and I couldn't. Also, we drew no mustering cards from the Westeros decks for several turns, meaning I was stuck with my initial forces while the others could expand their armies.


If I'd have known how passive Stark and Lannister were going to be, I'd have burned either Winterfell or Lannisport to the ground. After a succesful Baratheon spoiling attack on Harrenhal, House Lannister spent the rest of the game sitting on their hands, apart from a few desultory attacks on Seagard and the Reach. The Stark advance got bogged down in indecisive sea battles in the east, and eventually it came down to a Tyrell-Baratheon showdown. Baratheon overextended trying to grab Dorne, and eventually Tyrell rolled up the Baratheon position and won. I succeeded in grabbing Riverrun off the Lannisters, but it was too little, too late.


In retrospect, we all played too passively - except the Baratheons! I finished shared second, but my major mistake was imagining that Stark and Lannister were going to do something. However, what we all learned was that this is a really, really good game. It's fairly approachable, and the bidding mechanisms for the various tracks, as well as the combat rules, are easy to pick up once you actually start using them.

**

We're working on scheduling another game, this time with the full complement of players. Also, I was delighted when Fantasy Flight announced a new expansion, featuring House Targaryen! So this is a subject we will be returning to. In the mean time, expansions or not, this game is a steal for its price and definitely worth playing. Highly recommended!

Aug 13, 2018

Let's Play Star Wars: Rebellion

“My lord,” said Anakinn, “The Jedi Fjord men cast their magic openly. They are not such men as cut runes in the roots in the twilight, but rather they use their magic for prophecy and for healing. But the Seith-men cast dark spells and dissemble; and if they give men help, it is only because they expect that they will then help them.”
- Tattúínárdǿla saga, Chapter 12: Concerning the Secret Counsel of King Falfathinn


Back in May, we had the distinct pleasure of trying Star Wars: Rebellion: an epic board game that's kind of like War of the Ring, but in space.


There's a huge map, covering a bunch of systems outward from Coruscant, and a boatload of figures from stormtroopers to Death Stars, and of course, several decks of cards and piles of tokens. Below, the map.


The two sides have different objectives. The Empire has to find and destroy the secret rebel base; if the rebels survive long enough and gain enough prestige while doing it, they win. Both sides have their fleets and armies, but everything revolves around leaders: only they can move forces on the map or complete missions. This both limits the number of available actions and is great for theme, because you're never moving, say, a star destroyer to this square; you're sending Vader to Geonosis. The leaders all have unique abilities that affect how likely it is they'll succeed at missions or how effective they'll be as commanders, and they can be captured, converted or even frozen in carbonite.

**

Our first attempt would be a three-player game, which works the same as War of the Ring, with two players sharing control of the bad guys. Since I'm something of a fan of General Tagge (he was right about the Death Star!), I elected to play the role of the Imperial General, with my brother-in-law, a TIE Fighter veteran, joining me as the Imperial Admiral.

The Empire, of course, starts with a crushing military superiority, and we cheerfully made use of this, happily humming along to the Imperial March as we wiped out the rebel military. However, we were having no luck finding their base...

At one point, Princess Leia went on a mission to Mygeeto, which was either a ploy to draw us away from the rebel base, or a ploy to make us think it was a ploy to draw us away from the rebel base. However that was, we'd just recruited Boba Fett, so we sent him to capture her, and succeeded!

Soon, Tarkin's Super Star Destroyer and the Death Star we were building at Dagobah spooked the rebels into abandoning their base at Utapau, but now we had no idea where they were. Tarkin was at Geonosis; Vader and the Death Star were at Nal Hutta, wondering whether to head for Kessel or Tatooine; Tagge was looking for the rebels at Yavin; our forces on Mygeeto were stuck with no transports and we couldn't deploy them any because of a very inconveniently placed sabotage marker, and Colonel Yularen was getting nowhere interrogating Leia. Everything was threatening to unravel; by now, I was convinced that the rebel base was on Dantooine and we'd never make it there in time with enough forces. That is, until, guided no doubt by the Force, the Emperor personally led a single Imperial Assault Carrier and one unit of Stormtroopers to Malastare, where he found the newly relocated rebel base, and won us the game.

We made several mistakes, and no doubt played very unoptimally, but we had an absolutely tremendous time doing it. Even when you don't know what you're doing, the game is wonderfully Star Wars in its execution, and it really feels like an epic story unfolding. We simply loved it.

**

I also got the chance to try a two-player game over Midsummer, again with the first game rules as it was my opponent's first time playing.


I decided to utilize my previous experience when picking a base location.


I was determined to use the Rebel fleet aggressively and take the fight to the Imperials, drawing them as far away from my base as possible.


To that end, on my first turn, Mon Mothma secured the loyalty of Utapau, and I massed the fleet at Rodia. This drew an Imperial response immediately, with one fleet attacking Utapau and another subjugating Naboo.


It was time to go on the offensive. Jan Dodonna had been captured infiltrating Naboo, and Admiral Ackbar led the rebel fleet there to rescue him and liberate Naboo. Despite the Emperor himself commanding the occupation force, they were wiped out in the First Battle of Naboo.


That victory, however, would be short-lived, as Grand Moff Tarkin led the Death Star to Naboo. The rebels lost a Corellian corvette in the space battle, and while the rebel ground force managed to take down an AT-AT, they were wiped out by a devastating bombardment from the Death Star. There was nothing to do but fall back on Rodia, but the sacrifice was worth it: the Death Star was moving ever further from my base.


While the rebel fleet regrouped, I deployed some forces at Nal Hutta and scattered ground units at various systems like Kashyyk and Cato Neimoidia, which even got the Coruscant garrison moving. At this point, pretty much the entire Imperial fleet, bar a single star destroyer at Felucia, was east of Coruscant. Even better, I managed to hit a jackpot: using the Infiltration mission to churn through the objective deck got me the Death Star plans, and I drew General Dodonna's mission card, which allows you to attack a system with an Imperial ship in it with units from the Rebel base. My fleet had already destroyed half of the Death Star's fighter screen at Second Naboo; I now sent Chewbacca on a sabotage mission to blow up the last two TIEs, and the coast was clear. The Death Star's defenses shot down our Y-wing, but the two X-wings finished the job, and that's how Jan Dodonna blew up the Death Star.


Meanwhile, part of the Coruscant garrison had made its way to Alderaan, and the Imperial fleet at Felucia advanced to Dathomir, searching for my base. My fleet destroyed the Imperial ships at Toydaria, but we lost the ground battle. At this point, it was only a question of time until the Empire found my base, but I had high hopes that I had killed enough time to stop them from gathering enough forces to overrun it before the game ended. With that in mind, I used Rapid Mobilization to move the remnants of my fleet to the base.


Thus, when Moff Jerjerrod's task force found my base on Dantoiine, we wiped them out.


Now that the base was revealed, it was a question of time: would the Empire be able to mass enough forces to destroy the base before time ran out? It didn't look good, but they had one fiendish trick up their sleeve: Boba Fett captured Admiral Ackbar and delivered him to Darth Vader, who had him frozen in carbonite! This cost us one reputation and actually extended the game by one turn.


Still, even that wasn't enough: a huge Imperial force was bearing down on Dantoiine, but time ran out for them and the rebellion was victorious.


It was a damn near-run thing, but the rebels held out and we had a great time seeing it through. I should also mention that while none of the Imperial forces could reach my base in the last turn, what they did have time to do was convert Admiral Ackbar to the dark side.

**

As with War of the Ring, I think the three-player experience is excellent. With both games, though, I wish there was some incentive for the players on the bad guys side to not co-operate; a prestige tracker or something like that. Even without it, though, I think the three-player game offers the best possible combination of strategy and social interaction. Mind you, this doesn't mean the game isn't great fun with two players!

In my opinion, there are a couple of things that really elevate the Rebellion experience. First and foremost, theme. The game does a great job capturing memorable moments from the original trilogy, but in a freeform enough way that the people and circumstances around them can change: this time, Jan Dodonna destroys the Death Star. The leaders are really important for this, but so are the units: from a gameplay perspective, it's not necessary to have both AT-STs and AT-ATs, but it does wonders for theme. Also, the miniatures are excellent, and really contribute to the feel of the game.

Second, I can't see two games ever being exactly the same. There are at least five good choices for the rebel base location based purely on geography (astrography?), and that's without factoring in the psychological aspects. Similarly, the way the missions amd objectives come up will change games a lot; our second three-player game was completely turned around when we drew and succesfully played Homing Beacon.


More importantly, there's a great psychological game going on with the Imperials trying to guess where the rebel base is, and the rebels trying to guess where the Imperials think it is, and both trying to mislead the other, and I don't see this playing out the same way many times either. The psychological and social dynamics are an absolute treat.

**

We've also got a copy of the Rise of the Empire expansion, so we'll be returning to Rebellion later! For now, suffice to say that this is an absolutely tremendous game, and I'm looking forward to playing it many, many more times. It's like War of the Ring, but not nearly as stressful or complicated, while still being a wonderfully intriguing strategic challenge. It also seems to be excellently balanced: you can find threads on Boardgamegeek where people are convinced the rebels win every time, and another where someone sold their copy of the game because it's so boring when the Empire wins every time. All I can say at this point is that I've thoroughly enjoyed playing both, and I highly recommend this game.